Step 1
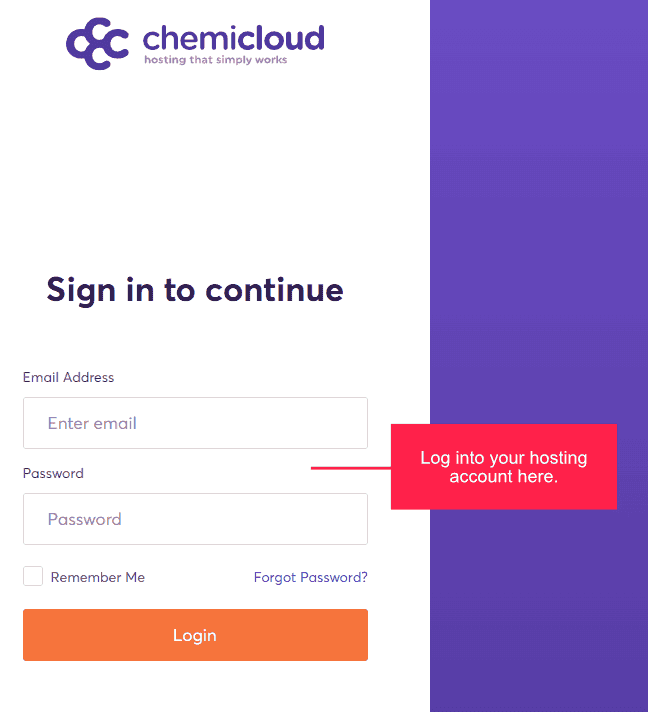
Log into your ChemiCloud Web Hosting Account
Please note: We currently use ChemiCloud for our web hosting needs, so this tutorial is demonstrated using their platform. Many hosting providers include cPanel with their hosting packages, so once you reach the Softaculous step, the remainder of the process should be nearly identical regardless of host. So your first step is to log into your web hosting account, for ChemiCloud users, visit the login page here.
Step 2
Select the cPanel Option
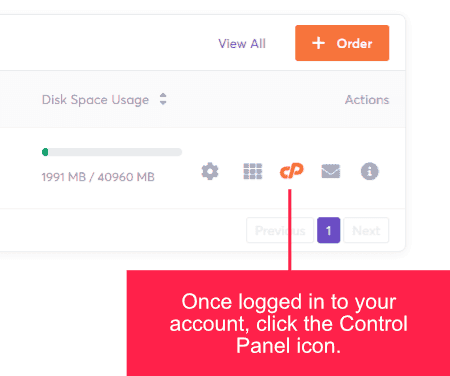
Once you have completed logging into your account, you will see the cPanel icon (shown below), simply click this icon to open the cPanel.
Step 3
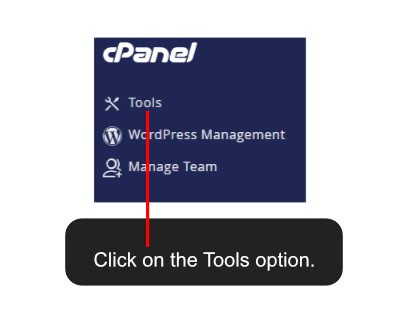
Select the Tools Option
Once inside cPanel, you will see a screen similar to the below image. Simply click the ‘Tools’ option to open the next screen.
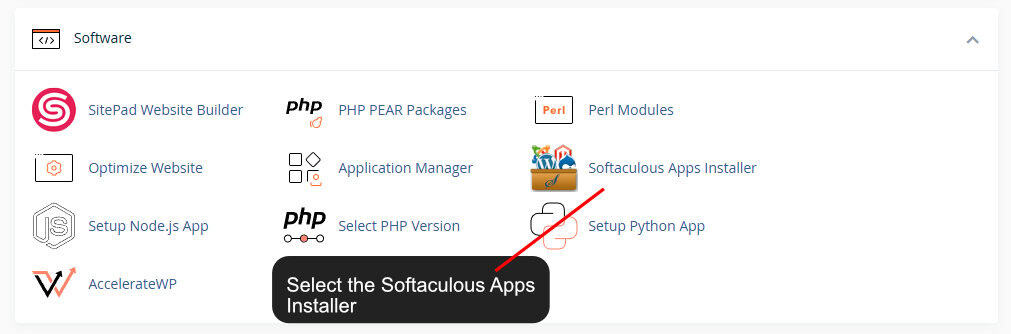
Step 4
Find the Softaculous Apps Installer
The Softaculous app will be in the ‘Software’ section of your cPanel account. Once you locate it, click it to open up a new screen.
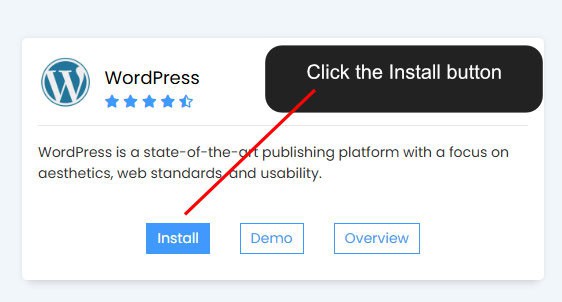
Step 5
Select the WordPress Install Button
Once Softaculous has loaded, find the WordPress app (for ChemiCloud users, it will be on the top left of the screen), click the ‘Install’ button to begin the process.
Step 6
Choose your Settings
Part 1 – Software Setup
This area will allow you to choose your domain and, if you wish to install WordPress into a folder, enter the folder name and also select the version of WordPress you want to install. The domain should be the domain that you want to install WordPress to, make sure the folder option is blank if you want to install to your web hosting root, and it is generally recommended that you install the latest stable version of WordPress.

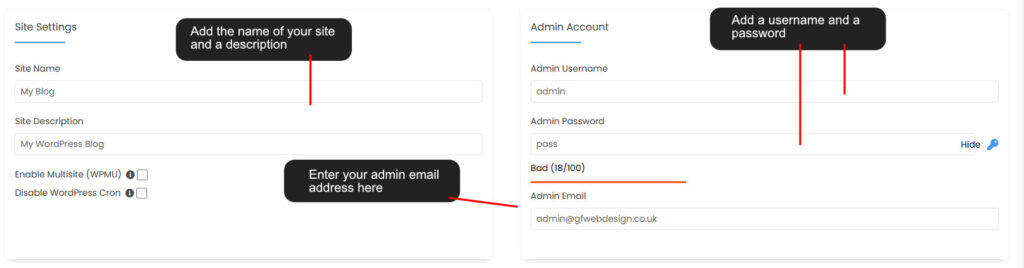
Part 2 – Site Settings
In this part, you can give your site a name and add a description, these can be left as their defaults for now, as they can be changed later from within WordPress. The most important section is the Admin Account, here you have to add a username and a password, for a username, try and avoid using ‘admin’, instead use something like: author-5748 (or along these lines) and for a password, use a password that is at least 12 to 15 characters long, utilising a mix of uppercase and lowercase letters, numbers, and symbols (make a note of your username and password for future use). You should also add an Admin email address in this section.
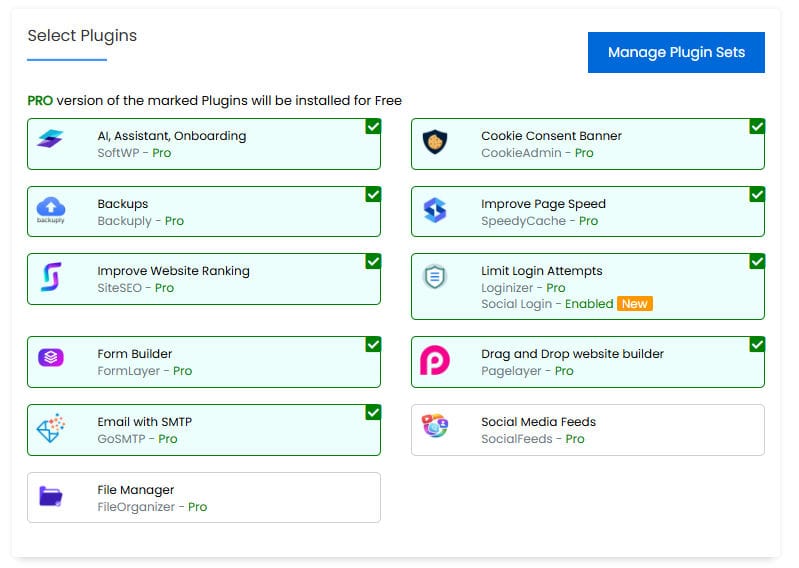
Part 3 – Select Plugins
Depending on your hosting provider and Softaculous licence, you may see optional premium plugins available during installation., in this part, you are provided with options to install the plugins, these can prove to be very useful, but if you already have pro versions of alternative plugins, then you most likely will not need any of these (for example, if you already use an SEO plugin such as Rank Math or Yoast SEO, you may not need an additional SEO plugin). You can also select your preferred WordPress language.
Please note, some premium plugins installed through Softaculous may not receive updates through the standard WordPress update system. If this applies, updates can usually be managed through Softaculous within your hosting account.

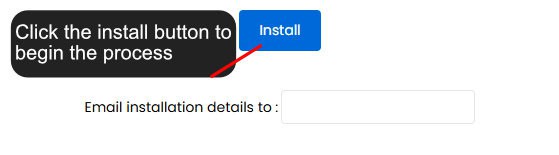
Step 7
Click the Install Button to Begin the Process
At the bottom of the screen, you will see the ‘Install’ button, click this button to begin the installation. You can also add an email address to receive the installation details when it is completed.
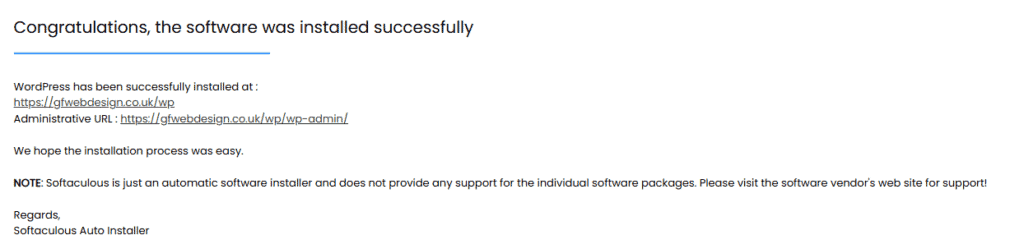
Step 8
Installation Complete
After a few moments, the installation will be complete, simply click the ‘Return to WordPress Management’ button to view the installation details.

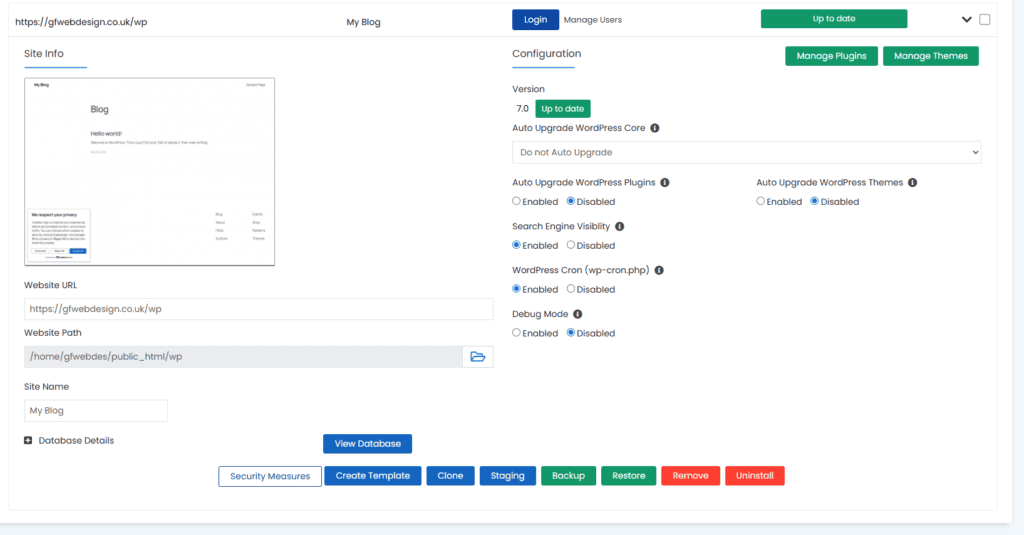
Step 9
WordPress Management Screen
Once installed, and after clicking on the ‘Return to WordPress Management’ button, you will see the installation details shown in the image below, just click the ‘Login’ button to log into your new WordPress website.
All Done
If you require any further guidance or assistance with installing WordPress, please feel free to contact us directly, or feel free to ask any questions using the comments section below.